Infant Massage Tutorial: Part II
Part Two moves from the warm-up to the main massage techniques, step-by-step.

Part II:
Primary Techniques
In Part I, you learned how to set the stage for your baby’s comfort as well as the warm up.
Now, you’ll learn techniques to stimulate digestion and brain development. Let’s do it!
First Massage Movement

You’ll want to start with two flat hands, going back and forth; and back and forth; and keeping that warming motion going.
With those two flat hands, come from the midline, come out to the sides, and then change up and we move in various directions.
As you can see, you have the outline of the intestines, and just in the same way that if you had a garden hose that had kinks in it, you'd want to start at the end of it to unkink.
The first move - with a flat hand or just a few fingers - is to start down above the hip crease of the left side, and come across.
Babies come in all shapes and sizes - and so do our hands - so it just depends on what works best for you and your baby. If something different is more comfortable, stick with that!
Second Massage Movement
The next move that you're going to do is to come up under the chest on the left side and come straight down into that hip crease, then bring that down about three to five times.
Next, connect it with the first stroke that you did.
So, if you're looking at this like a clock: first you're around like 1-2 o'clock; and then you're coming all the way down to six o'clock.
Babies and hands come in all shapes and sizes - so do what is comfortable for everyone!
Once you've done that a few times, you're going to come across to just under the right side of the chest, and come all the way across the top.
Do about three to five nice, broad, flat movements, connecting them all the way down to six o'clock.

Once you feel good about that, come down into the right side
of the crease and go all the way up -
doing about three to five of those movements as well
.
Then, when you feel complete there, go ahead and bring these around in a circle, connecting those movements all the way around.
This technique is really great to help stimulate digestion. If there's any gas trapped in there this will help move it along.
Generally, you can feel gas bubbles move and you can even see it!
There could be elimination at this time, so if your baby has come out of the bath and doesn’t have any diapers or clothing on, you want to make sure that you have some sort of changing pad underneath.
To complete this movement, come back out from the midline with gentle movements with a nice warm hand and just rest on top of the belly - kind of doing a nice little Shimmy Shimmy Shake.
THIRD MASSAGE MOVEMENT
Our third movement will be in continuation with the limbs, and we're going to go up into the hands.
The hands and arms are going to be very similar to the legs massage from Part I. You want to support the arms and do a nice, broad flat movement all the way up.
Take the little Loop and ring out again, being mindful of the joint areas - giving a bit more pressure where the muscles are, rather than where the bones are.
Move all the way up, then all the way back down; doing flat strokes again.
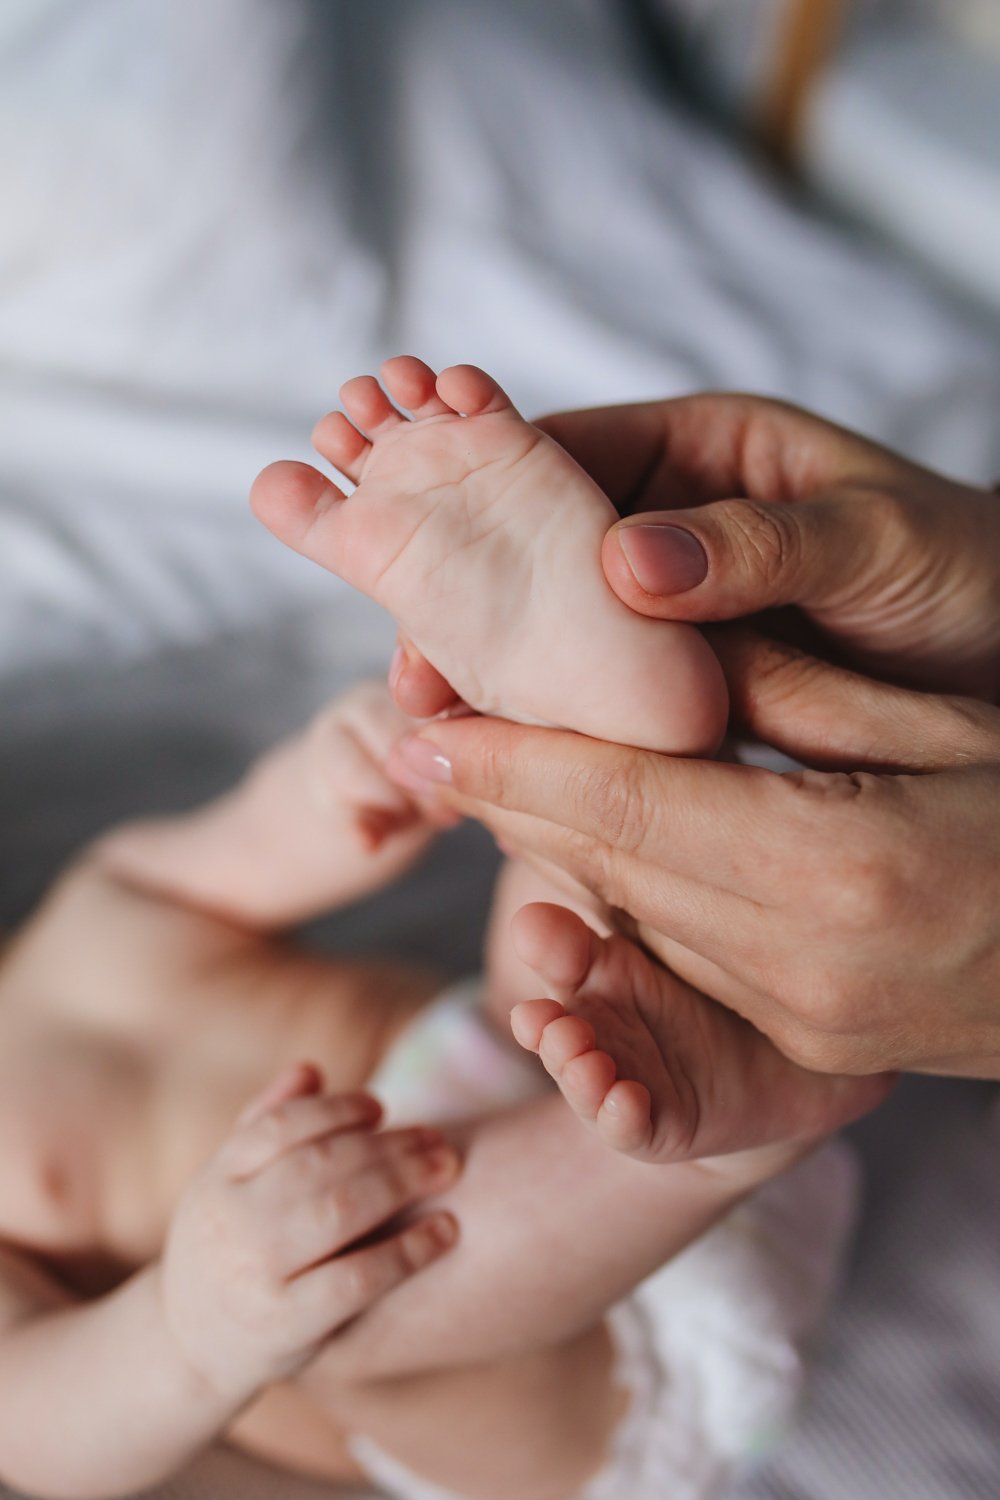
Then the same way we worked on the feet, you can work on the hands: do nice circles in the palms, then going through each of the fingertips just like you did the toes.
Stroke up and do small circles in the palm of the hand, going through each of the fingertips.
Then the same on the other side:
flat palms
ringing motion
up and down
flat Palms again
and a little bit in the hands.
PASSIVE LIMB MOVEMENT
Passive limb movements are also really great to do on the arms, just as we did on the legs.
Alternate up and down, bringing the arms up at the same time and then coming back down, doing these movements again and again.
This can be a really fun game for the baby!
You can take them out to the side and bring them in; you can also alternate leg and arm movements going in together.
Whenever you do any crossbody movements
like this it connects the left and right
hemispheres of the brain.
It also
really helps introduce the idea of crawling.
So you can do little crawling motions and it will get their body into the habit.
READY FOR PART III?
Now you’ve learned the main part of infant massage and you’re ready for the wrap up. Head over to the final blog post and learn how to give your baby the last part of the massage to help with sleep, digestion, cognition, family bonding, and more.